How To Create Hair Caps: a few different workflows
The Hair Cap is basically the mesh that has a shape of the character's scalp, and plays a role of a hair coverage layer and placed under the hair cards. It's most useful for the short hairstyles, which have buzzcut or fade.
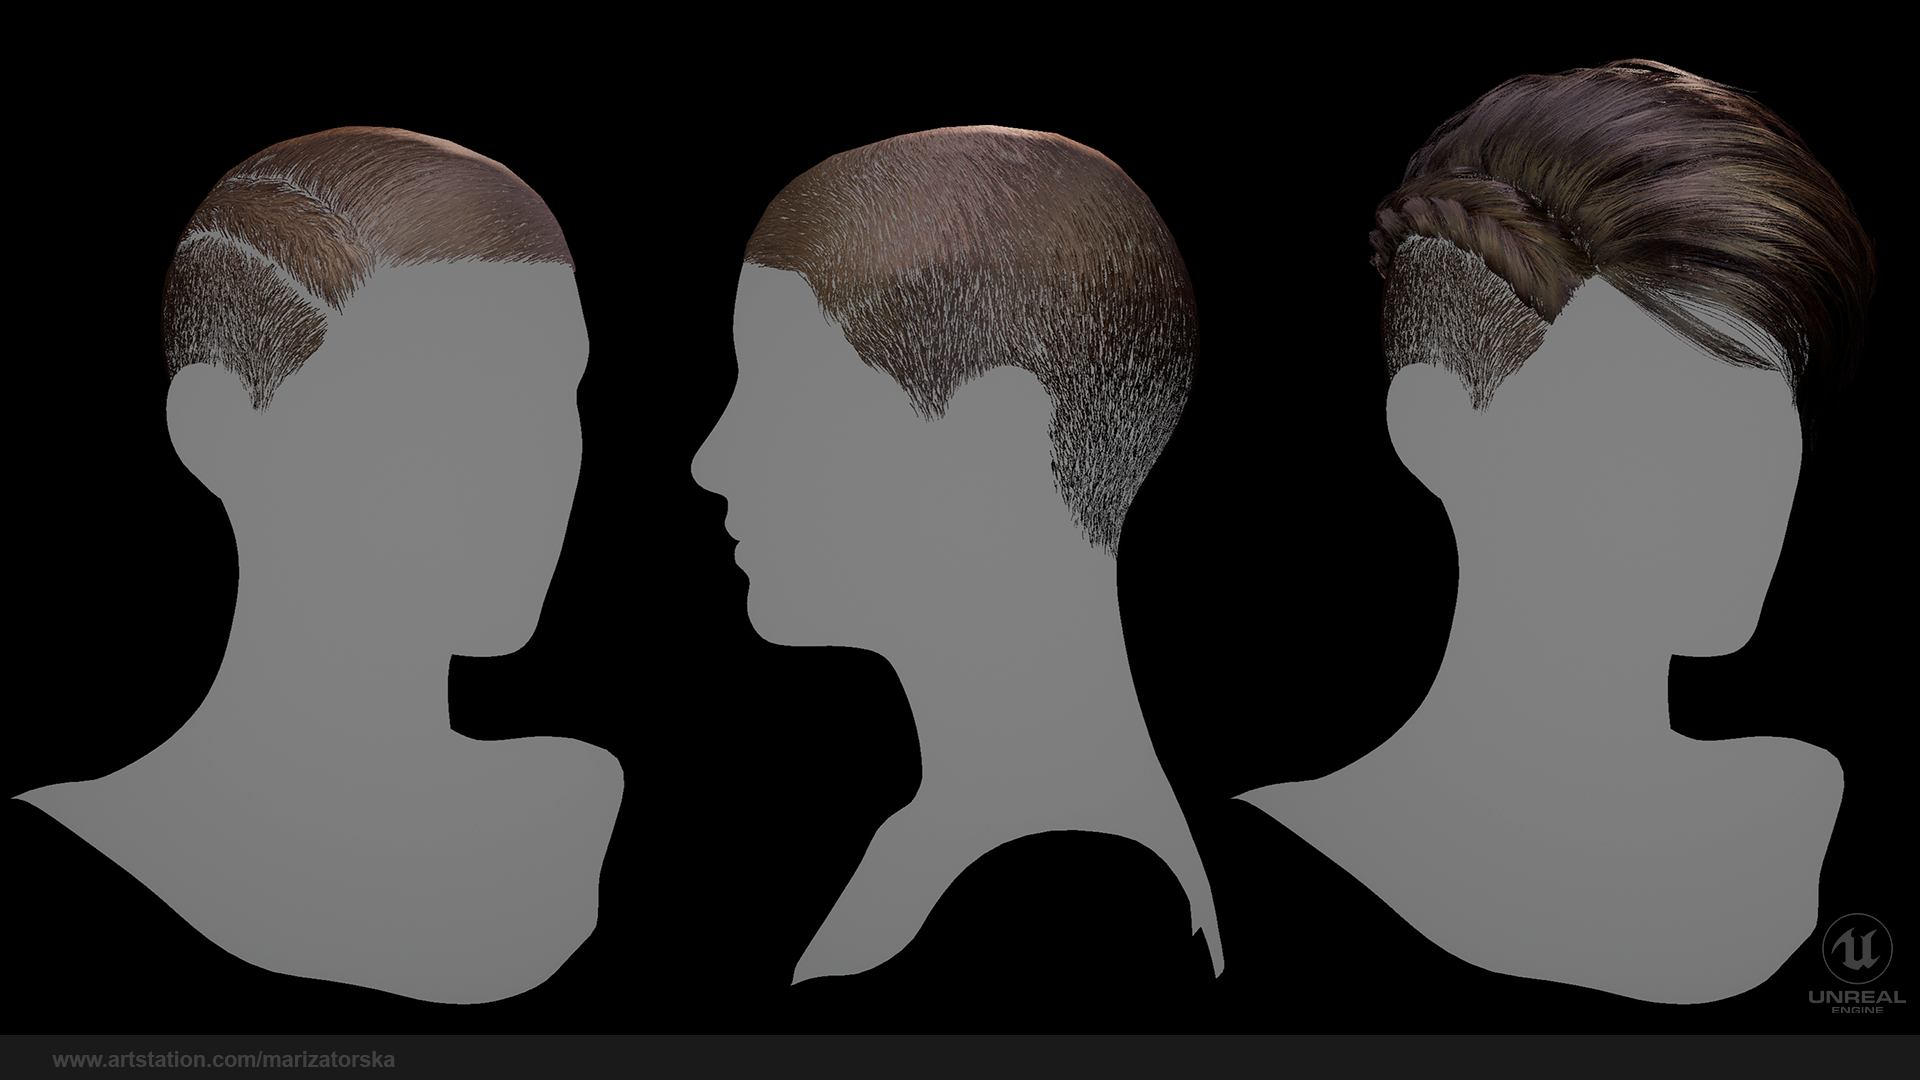
Hair Cap for game character
Creating the hair cap essentially means to create the texture of the short hair for the character's scalp. Because placing the hair cards for the short hair like the buzzcut or fade is not always going to look good. And maybe will save you some triangles.
Here are a few ways to create the hair cap for real-time characters.
1. Paint the hair in Substance Painter
With Substance Painter's default hair brushes you can get a pretty decent hair caps to use for stylized characters. The main downfall of this technique - is that you will be able to get only a few texture maps in the end - Alpha, Normal (from adding height channel to your painting layer), AO (from Normal) and Flow map - yes, you can easily paint the Flow map in SP. Here’s a link to How to paint flow map with Substance Painter >>.
Unfortunately, I don't know how you can make ID and Root maps using this workflow.
2. HairTG - Surface for Substance Painter
HairTG – Surface, Hair Cover Edition is a texture generator for Adobe Substance Painter that lets you apply procedural hair covers such as the scalp, beard, etc. Please check this fantastic tool by Olivier Lau
The advantage of this workflow is that you will get every possible PBR maps: Opacity, Depth (Height), Color (basecolor), Diffuse, Flow (Direction), Normal, Roughness, Ambient Occlusion , in up to 8K in resolution.
3. Bake from xGen generated hair to cap mesh
The workflow shown by Jansen Turk gives great results for realistic characters. I also made a video of following this workflow - check it out.
The idea of this workflow is to create hair with Maya xGen or Interactive Grooming tool (I will be using the Interactive Groom, but xGen hair can be easily converted into Interactive Groom for baking setup) and bake the hair high poly models with strands into cap 3D mesh in Marmoset Toolbag to get the different texture maps – Alpha, Diffuse, Depth, Id and Gradient Ramp (or Root map as it is also called).
4. Bake in ZBrush
Follow the process of Rodesqa___ to make the hair cap textures in Zbrush.
https://www.youtube.com/watch?v=d406eGmPaYA
5. Painting in ZBrush and Photoshop
Another great way to make the cap textures in ZBrush by Airship Images - the art outsource company that made hair for the famous AAA titles. They share their workflow on their website.

6. Hair Tool for Blender
Check out this fantastic tool for Blender that not only helps you with placing hair cards but saves your time in making the textures, for hair cap as well.

7. Using Blender hair particles
You can make the hair cap textures in Blender using a hair particle system and bake them in the same way in xNormals or Blender as shown in the workflow for Maya and Marmoset. Unfortunately, I don't have any example to show you, maybe I'll update this post later.